Quarantine Survival Kits!

Just like most of the world, you’re looking for something fun to pass the time or keep the kiddos entertained. DIY cookie kits have been sweeping Instagram! Whether you’re an experienced cookie decorator or a trying it for the first time, these kits make it fun and easy.

You can order kits by contacting me here. Kits are $28 each or $50 for two of the same theme going to the same house.
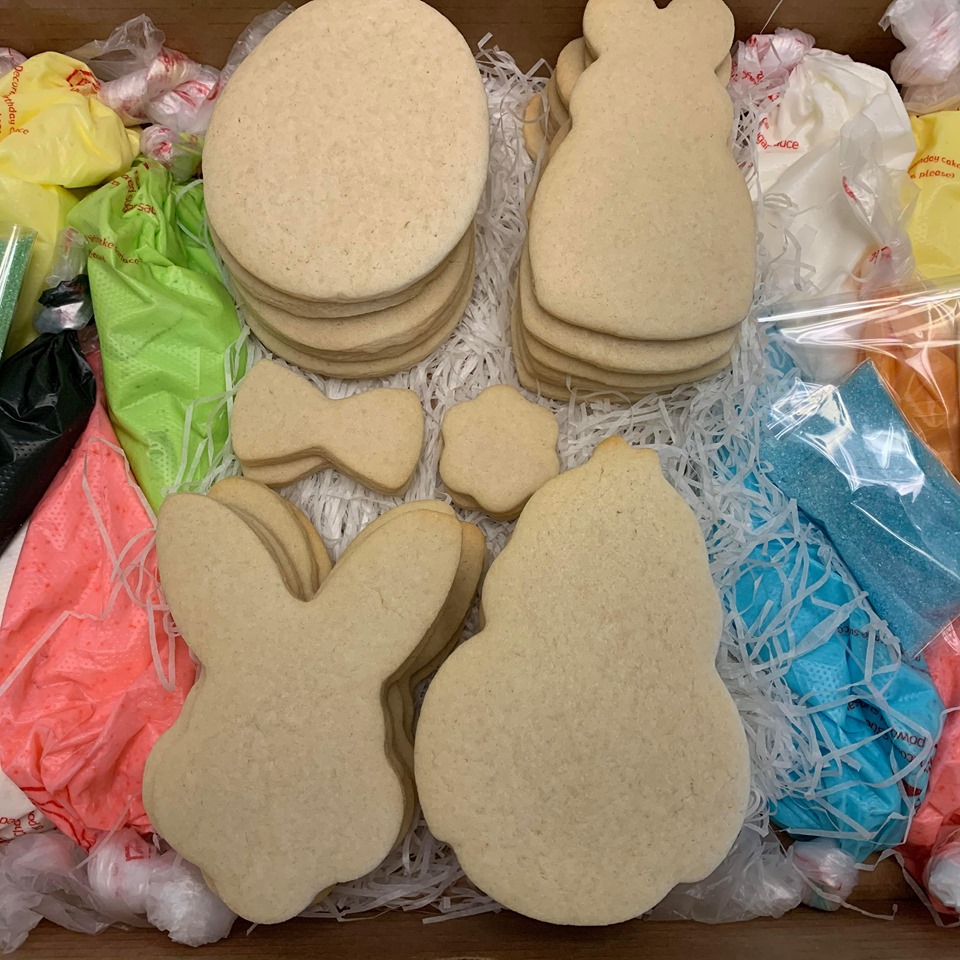
Each one includes 12 cookies, 4 colors of royal icing, and a little bit of bling!
You choose the theme, I choose the shapes!
- Summer Fashion (shown here)
- Easter
- Woodland
- Baby
- Bride
- Unicorn
- Under the Sea

Either let your imagination go wild or use my gallery or instagram for inspiration. Either way, enjoy yourself!

The first rule in cookie decorating is to remember it’s ONLY A COOKIE!
Here are some basic tips for icing for video tutorials click here:
- Knead the icing bags before cutting them open to re-blend any separation.
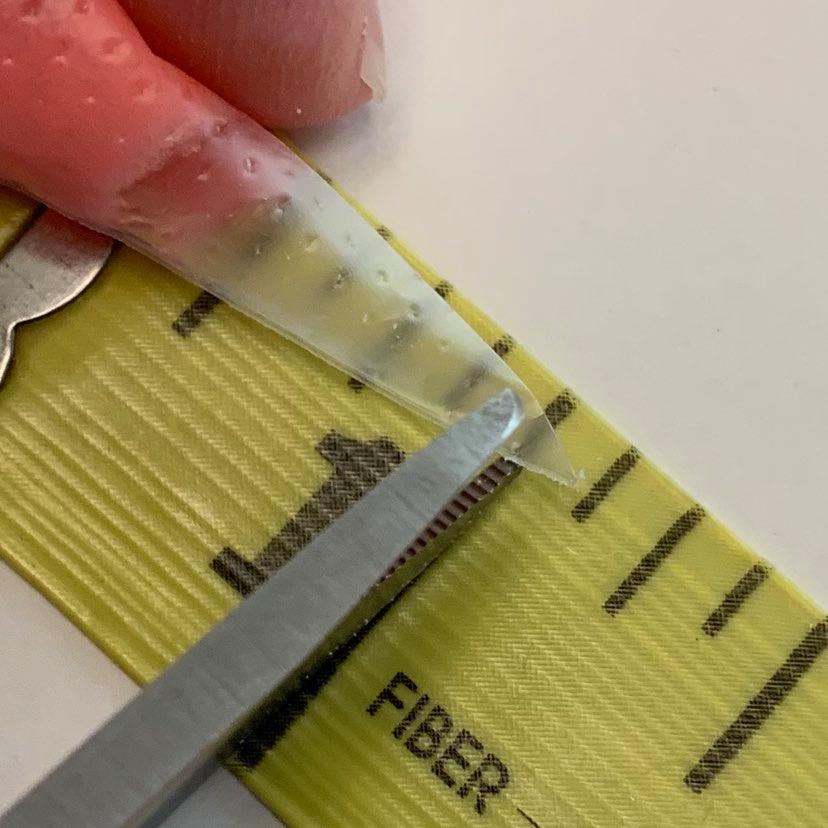
- Cut the tiniest bit of the tip of the bag off with sharp scissors.
- Outline your cookie and set it aside for 1-2 minutes before filling it in with icing.
- Cookies take 12-24 hours to dry completely so leave them out, uncovered to air dry overnight.
- Royal icing can be stored at room temperature for up to a week and then can be refrigerated or frozen.
- The entire kit can also be frozen for up to 2 months if you’re not quite ready to jump in!
Here are the descriptions of how to get different effects:
Outlining
Touch down at the starting point of your outline and lift up. Pretend your icing is a string and guide it where you want it to land from ½-1 inch above your cookie.
Flooding
Touch down and squeeze holding the tip of your bag close to the cookie following the inside of your outline around and around until you are at the center of your cookie.
Wet-on-wet
Placing icing on top of still-wet icing so that they meld together at the same height.
Wet-on-dry
Placing icing on top of already-crusted icing to create dimension and height.
Wet-next-to-wet
Using wet icing next to still-wet icing so there is no seam between colors.
Wet-next-to-dry
Using wet icing next to icing that has already crusted. Crusting only takes a few minutes. This is a great technique if you want a seam to show between to colors that are the same or to differentiate between sections.
Marbling
Using a toothpick or scribe tool to create designs in wet-on-wet icing.
SHARE YOUR CREATIONS!
I’d love to see your creations so please tag me in your Instagram stories or send me some pix via email. I can’t wait to see what your inner artist came up with!